
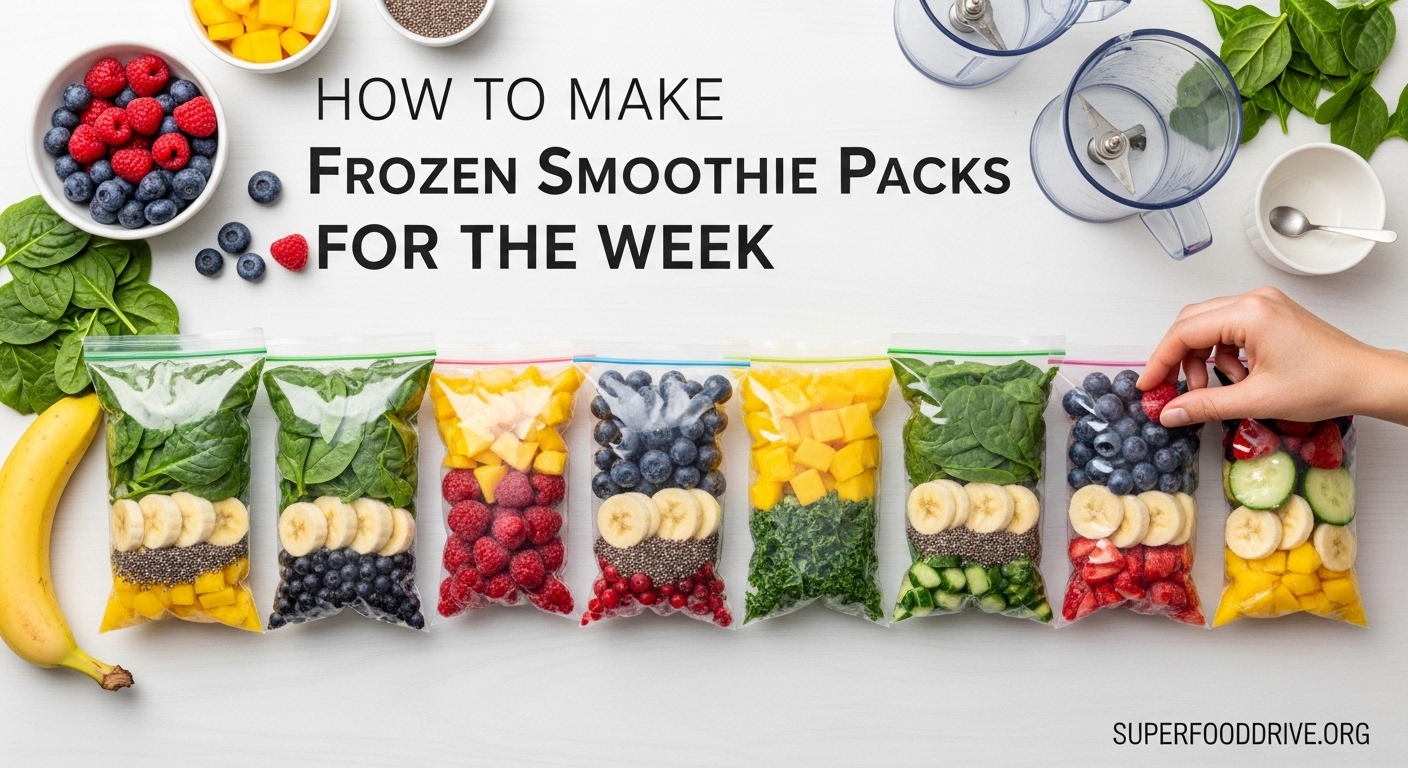
Mornings can be chaotic. Between getting ready for work, packing lunches, and trying to squeeze in a healthy breakfast, it is easy to reach for something convenient but not so nutritious. That is exactly why I started making frozen smoothie packs for the week, and it completely transformed my morning routine.
In this guide, I will show you how to make frozen smoothie packs for the week that take less than 30 minutes to prep and give you grab-and-go breakfasts for days. You will learn the exact steps I use to batch prep 10 to 15 smoothies at once, plus tips for preventing common problems like browning bananas and freezer-burned fruit.
Whether you are a busy parent, a meal prep enthusiast, or just someone who wants to eat more fruits and vegetables without the morning hassle, this method will save you time, money, and decision fatigue.
Table of Contents
Why Frozen Smoothie Packs Are Worth Your Time
I used to spend $6 to $8 every morning at a smoothie shop near my office. That added up to over $150 per month just on blended fruit. Making frozen smoothie packs at home cuts that cost to about $1 to $2 per smoothie, saving me over $100 monthly.
Beyond the budget benefits, meal prep smoothies eliminate decision fatigue. When your ingredients are already portioned and frozen, you just dump, blend, and go. No measuring, no chopping, no wondering if you have enough spinach left.
Another hidden benefit is reducing food waste. Those bananas getting spotty on your counter? Those slightly soft berries in the back of the fridge? They are perfect for smoothie packs. You can rescue produce that would otherwise get tossed, saving money and cutting down on kitchen waste.
For families, frozen smoothie packs are a game-changer. Kids can help themselves to a healthy breakfast by simply adding the frozen contents to a blender with liquid. It builds independence while ensuring they get fruits and greens in the morning.
What You Need to Make Frozen Smoothie Packs
Before you start assembling, gather the right supplies. The good news is you probably already have most of what you need in your kitchen.
Storage Containers: Your Options
You have three main choices for storing frozen smoothie packs. Quart-sized zip-top freezer bags are the most popular option because they are inexpensive, stack flat, and take up minimal space. Lay them flat while freezing and you can stack them like files in a drawer.
Reusable silicone bags are the eco-friendly alternative. Brands like Stasher bags work beautifully for smoothie packs and can be washed and reused hundreds of times. They cost more upfront but pay for themselves within a few months if you are making smoothie packs weekly.
Wide-mouth mason jars work well if you prefer to avoid plastic entirely. Use 16-ounce or 32-ounce jars depending on your portion size. Leave about an inch of headspace since contents expand when frozen. The downside is jars take up more freezer space and can break if overfilled.
The Right Blender Matters
Here is the truth: any blender can handle frozen smoothie packs if you add enough liquid and blend long enough. However, a high-speed blender with at least 1000 watts makes the process effortless. I use a Vitamix that pulverizes frozen fruit in 30 seconds, but I have also tested this method with a $40 basic blender and it works fine with a few extra seconds of blending.
If you are using a less powerful blender, cut your fruit into smaller pieces and let the frozen pack sit at room temperature for 5 minutes before blending. This softens the edges just enough to help weaker motors.
Basic Ingredients to Stock
Every smoothie pack needs three components: frozen fruit, greens or vegetables, and a liquid base for blending. For fruits, stock bananas, berries, mango, pineapple, and peaches. Buy frozen bags from the grocery store or freeze fresh produce when it is on sale.
For greens, spinach and kale freeze beautifully and blend into smoothies without affecting texture. Baby spinach is milder in flavor, making it ideal if you are new to green smoothies.
Your liquid base options include almond milk, oat milk, coconut water, regular milk, or plain water. Do not add the liquid to your freezer packs. You will add it during blending.
Labeling Supplies
A permanent marker and masking tape work perfectly for dating and labeling your packs. Alternatively, freezer labels are inexpensive and peel off cleanly when you are ready to reuse bags. Write the date made and the flavor combination so you know exactly what you are grabbing.
How to Make Frozen Smoothie Packs
Now for the step-by-step process. I can prep a full week of smoothie packs in about 25 minutes once I have my system down.
Step 1: Prepare Your Ingredients
Start by washing all fresh produce thoroughly. For leafy greens like spinach and kale, remove any thick stems that can create fibrous texture in blended smoothies. Pat greens completely dry with a clean towel, excess moisture causes freezer burn.
Cut all fruit into 1 to 2-inch chunks. This size is perfect for both storage and blending. Bananas should be peeled and broken into 3 to 4 pieces each. Mangoes need to be peeled, pitted, and cubed. Pineapple should be cored and chunked.
Here is the critical tip for bananas: toss cut banana pieces in a splash of lemon juice or pineapple juice before freezing. The acidity prevents the oxidation that causes those unappealing brown-black color changes. I learned this after my first batches looked unappetizing despite tasting fine.
Step 2: Set Up Your Assembly Station
Lay out your storage bags or containers on the counter. If using zip-top bags, fold the tops over to create a wide opening. Some people use baggy holders or mason jar rings to keep bags propped open while filling.
Arrange your ingredients in bowls or on a cutting board in the order you will layer them. Having everything within arm’s reach makes assembly fast and prevents cross-contamination.
Step 3: Layer Ingredients Properly
The order you add ingredients matters for both storage and blending. Start with the heaviest, most solid items at the bottom. I put frozen mango chunks, pineapple, or peach pieces first.
Next add softer fruits like berries or banana pieces. Then add your greens on top. I know it sounds backward, but putting greens on top keeps them from getting crushed and frozen into clumps at the bottom of the bag.
If you are adding dry boosters like chia seeds, ground flaxseed, or protein powder, sprinkle them on top of the greens. This prevents them from settling into corners where they won’t blend properly.
Each pack should contain about 1.5 to 2 cups of total frozen ingredients. This creates a 12 to 16 ounce smoothie when blended with liquid, which is a standard serving size.
Step 4: Remove Air and Seal
Air is the enemy of frozen food quality. For zip-top bags, seal the bag almost completely, leaving a small corner open. Press flat and push out as much air as possible before sealing completely. The bag should look vacuum-sealed around the ingredients.
If you have a vacuum sealer, this is the perfect time to use it. Vacuum-sealed smoothie packs last even longer and take up less freezer space. Just be careful not to crush delicate berries during the sealing process.
For mason jars, leave 1 inch of headspace at the top. Wipe rims clean, place lids on, and screw bands fingertip-tight. Do not over-tighten or you risk broken jars as contents expand.
Step 5: Label and Date Everything
Write the contents and date on each pack before freezing. A simple label like “Berry Green – September 11″ tells you exactly what is inside and when you made it. I also note any special ingredients like protein powder so I do not accidentally double-dose.
Dating is crucial because frozen smoothie packs are best used within 3 months. While they remain safe to eat beyond that, texture and flavor degrade over time.
Step 6: Freeze Flat for Optimal Storage
Place your sealed packs flat on a baking sheet or clean countertop. Freeze for 2 to 4 hours until solid. Once frozen solid, you can stand bags upright in a bin, stack them horizontally like books, or arrange them however fits your freezer best.
The flat-freezing step is essential. If you toss unfrozen bags into a freezer bin, they freeze in lumpy shapes that waste space and make retrieval difficult. Flat packs stack efficiently and thaw more evenly when blending.
Recipe Combinations to Try
Variety keeps smoothie prep interesting. Here are five flavor combinations I rotate through regularly, each yielding about 10 to 12 smoothie packs depending on your portion size.
Strawberry Banana Classic
This is the gateway smoothie for skeptical family members. Each pack gets 1 cup frozen strawberries, 1 frozen banana (cut into chunks), and a handful of fresh spinach. The strawberries dominate the flavor while the spinach adds nutrition without changing the taste.
When blending, add 1 cup of milk or almond milk. The result is creamy, slightly sweet, and universally appealing. My kids request this one more than any other.
Tropical Green Power
For this sunshine-in-a-glass combination, add 1 cup frozen mango chunks, 1/2 cup frozen pineapple, 1 frozen banana, and 1 cup fresh spinach or kale. The tropical fruits completely mask any green flavor.
Blend with coconut water for authentic tropical vibes, or use orange juice for extra vitamin C. This pack is my post-workout favorite because the natural sugars help with recovery.
Triple Berry Antioxidant
Combine 1/2 cup each of frozen blueberries, raspberries, and blackberries with 1 frozen banana and a handful of spinach. Berries are lower in sugar than tropical fruits, making this a great choice for those watching their sugar intake.
The deep purple color looks amazing, and the berry flavor is tart and refreshing. Use unsweetened almond milk as your liquid base to keep it light.
Chocolate Peanut Butter
This one feels like dessert but packs serious nutrition. Add 1 frozen banana, 1 tablespoon cocoa powder, 2 tablespoons peanut butter powder or 1 tablespoon actual peanut butter, and 1/2 cup frozen cauliflower rice. The cauliflower adds creaminess without any vegetable taste.
Blend with chocolate almond milk or regular milk for an indulgent treat that keeps you full for hours. The protein and healthy fats from the peanut butter make this a meal replacement smoothie.
Peach Ginger Green
For something different, try 1 cup frozen peach slices, 1/2 inch fresh ginger (peeled and sliced), 1 cup baby spinach, and 1/2 frozen banana. The ginger adds a warming kick that is especially nice in cooler months.
Blend with green tea that has been cooled to room temperature. The caffeine boost plus the anti-inflammatory ginger makes this my go-to on busy workdays.
Storage Tips and Shelf Life
Proper storage makes the difference between smoothie packs that last three months and ones that get freezer-burned in weeks.
How Long Do Smoothie Packs Last?
Frozen smoothie packs maintain best quality for up to 3 months when properly sealed and stored at 0 degrees Fahrenheit or below. After 3 months, they are still safe to eat but may develop ice crystals and slight texture changes.
I make smoothie packs every Sunday for the upcoming week, plus extras to carry me into the following week. This rotation keeps my stock fresh without overwhelming my freezer space.
Optimal Freezer Organization
Designate a specific bin or drawer for your smoothie packs. When everything has a home, you can quickly grab what you need without digging through frozen peas and ice cream.
If space is tight, store packs vertically in a magazine holder or bin. This filing system takes up minimal shelf space and makes every pack visible at a glance. I can fit 20 vertical packs in the same space that 10 horizontal packs would occupy.
Preventing Freezer Burn
Freezer burn happens when air reaches food surfaces, causing dehydration and oxidation. The prevention is simple: remove as much air as possible from your storage containers before sealing.
For zip-top bags, the water displacement method works great. Lower the bag into a water bath, leaving just the seal above water. The pressure pushes air out naturally. Seal the bag while submerged, then remove.
Keep your freezer at a consistent temperature. Frequent thawing and refreezing from a warm freezer causes condensation that leads to ice crystals. If your freezer has an auto-defrost cycle, store smoothie packs away from vents where temperature fluctuates most.
How to Blend Your Frozen Smoothie Packs
Having perfectly prepped packs means nothing if you do not know how to blend them properly. Here is my foolproof method.
The Liquid Ratio
For every 1.5 to 2 cups of frozen ingredients in your pack, you need 1 cup of liquid. Start with slightly less liquid than you think you need. You can always add more, but you cannot remove it once blended.
Best liquid options include: unsweetened almond milk (creamy, low calorie), oat milk (thick and naturally sweet), coconut water (hydrating, tropical flavor), regular dairy milk (protein-rich), or plain filtered water (zero calories, lets fruit flavors shine).
Blending Technique for Frozen Chunks
Dump your frozen pack contents into the blender first, then pour liquid over the top. This helps the blades catch the frozen pieces immediately.
Start on low speed for 10 seconds to break up large chunks, then increase to high for 30 to 45 seconds. If your blender has a frozen drink or smoothie preset, use it.
If ingredients are not moving, stop the blender and use a tamper tool (if your blender came with one) or add a splash more liquid. Never stick a spoon or spatula into a running blender.
Adding Extra Boosters
Now is the time to add anything you did not include in the frozen pack. Common additions include: protein powder, collagen peptides, Greek yogurt for extra creaminess, nut butter for healthy fats, or fresh ingredients like avocado that do not freeze well.
Blend for an additional 10 seconds after adding boosters to fully incorporate them.
Troubleshooting Thick Smoothies
If your smoothie is too thick to drink through a straw, add liquid 2 tablespoons at a time and pulse until you reach desired consistency. For smoothies that are too thin, add a handful of ice cubes or 1/4 frozen banana and blend again.
The perfect smoothie consistency should coat the back of a spoon but still flow easily. Think melted milkshake rather than soft-serve ice cream.
Pro Tips and Mistakes to Avoid
After making hundreds of smoothie packs, I have learned some lessons the hard way. Save yourself the trouble by avoiding these common pitfalls.
Preventing Banana Browning
The most common question I get is about bananas turning black in the freezer. While they are still safe to eat, the color is unappealing. The solution is coating cut bananas in acidic juice.
Toss banana chunks in a bowl with 1 tablespoon lemon juice, lime juice, or pineapple juice per 2 bananas. The vitamin C prevents oxidation. Drain excess liquid before adding bananas to your packs. You will not taste the citrus in the final smoothie.
Cut Size Matters
Cut all fruit and vegetables into uniform 1 to 2-inch pieces. Pieces larger than 2 inches strain blender motors and may not fully blend. Pieces smaller than 1 inch freeze into solid blocks that are hard to break apart.
Leafy greens should be roughly torn into pieces about the size of your palm. Whole leaves can freeze together in clumps that resist blending.
Avoid Blender Overload
Never fill your blender more than two-thirds full with frozen ingredients. Overloading strains the motor, creates uneven blending, and can damage your blender over time.
If you are making smoothies for multiple people, blend in batches rather than cramming everything into one load. Two properly blended smoothies are better than one partially blended disaster.
Using Overripe Fruit Effectively
Overripe bananas, soft peaches, and mushy mangoes are smoothie gold. The natural sugars concentrate as fruit ripens, making smoothies sweeter without added sugar.
Rescue browning bananas by peeling and freezing them immediately. Cut away any truly spoiled spots, but soft texture is perfectly fine. I keep a dedicated bag in my freezer just for overripe banana pieces.
Eco-Friendly Alternatives
If you want to reduce plastic use, invest in reusable silicone bags or glass jars. Another option is freezing smoothie ingredients in ice cube trays. Blend the frozen cubes directly with your liquid base.
Some people freeze smoothie ingredients in muffin tins, then pop the frozen pucks into a large container. Grab one puck per smoothie. This method uses zero individual bags but requires more freezer space initially.
Budget Breakdown: Homemade vs Store-Bought
Let us talk numbers. A store-bought smoothie costs between $6 and $10 depending on your location and add-ins. Making frozen smoothie packs at home costs between $1 and $2.50 per smoothie.
Here is my typical cost breakdown for a week of berry green smoothies: frozen mixed berries ($4 for a large bag), bananas ($1 for a bunch), fresh spinach ($3 for a large container), and chia seeds (pennies per serving). That is about $8 for 10 smoothies, or 80 cents each.
Even if you splurge on organic ingredients and premium add-ins, you will rarely exceed $2.50 per smoothie. Compared to the $8 average at smoothie shops, that is a savings of $5.50 per day or $38.50 per week.
Over a year, making smoothie packs at home instead of buying out saves approximately $2,000. That is a vacation fund, a new laptop, or a significant chunk of debt paid off.
Bulk Buying Tips
Buy frozen fruit in large bags from warehouse stores like Costco or Sam’s Club. A 5-pound bag of frozen organic berries costs about $10, which is half the per-pound price of smaller grocery store bags.
Buy fresh produce when it is in season and freeze it yourself. Summer strawberries and peaches freeze beautifully and cost a fraction of their off-season prices. Simply wash, cut, and freeze on a baking sheet before transferring to storage bags.
FAQ: Your Smoothie Pack Questions Answered
Can I make smoothies for the week and freeze them?
Yes, you can prep smoothie packs up to 3 months in advance. However, blend smoothies fresh rather than freezing the finished blended smoothie, as texture changes significantly when thawed. Frozen packs of unblended ingredients maintain quality much better than pre-blended frozen smoothies.
How long do smoothie packs last in the freezer?
Properly sealed smoothie packs last up to 3 months in the freezer at 0 degrees Fahrenheit. After 3 months, they remain safe to eat but may develop freezer burn and texture changes. For best flavor and nutrition, use within 1 to 2 months.
Can you freeze spinach for smoothies?
Absolutely. Spinach freezes excellently for smoothies and actually blends more smoothly when frozen first. Wash and dry fresh spinach thoroughly, then pack it loosely into bags. Frozen spinach breaks down into tiny pieces that incorporate seamlessly into blended drinks without the fibrous texture fresh spinach can have.
Can I freeze nut butter and protein powder in smoothie packs?
Protein powder and ground seeds like chia and flax freeze well and can be added directly to packs. Nut butter can technically be frozen but becomes hard to blend. It is better to add nut butter fresh when blending, or use peanut butter powder which incorporates easily from frozen packs.
Why do my bananas turn black in freezer packs?
Bananas turn black due to oxidation when exposed to air during freezing. To prevent this, toss cut banana pieces in lemon juice, lime juice, or pineapple juice before freezing. The acidity stops the browning enzyme. Drain excess juice before adding to packs. The bananas stay pale yellow and look appetizing when blended.
What is the best fruit to vegetable ratio for smoothie packs?
A good starting ratio is 2 parts fruit to 1 part vegetables. This creates a sweet, palatable smoothie while delivering solid nutrition. As you get accustomed to green smoothies, you can adjust to 1:1 or even favor vegetables. Beginners should start with mild greens like spinach rather than strong-flavored kale.
Do I need a high-speed blender for frozen smoothie packs?
While high-speed blenders like Vitamix or Blendtec make the process faster, any blender can handle frozen smoothie packs with proper technique. Cut ingredients small, add enough liquid, and let frozen packs sit at room temperature for 5 minutes before blending. Blend in pulses if needed to give the motor rest periods.
Can I use water instead of milk for blending?
Yes, water works perfectly fine as a blending liquid and is the most budget-friendly option. The fruit flavors shine through more clearly with water. However, milk or plant-based alternatives create creamier textures and add protein and calcium. Coconut water is another excellent option that adds electrolytes and subtle sweetness.
Conclusion: Start Your Smoothie Prep Journey Today
Learning how to make frozen smoothie packs for the week has been one of the best kitchen habits I have ever adopted. The 30 minutes I spend on Sunday prepping saves me hours of morning stress, hundreds of dollars monthly, and countless decisions about what to eat for breakfast.
You now have everything you need to get started: the exact assembly process, five proven flavor combinations, storage tips to maximize freshness, and answers to all the common questions that trip people up. The method is forgiving, so do not worry about being perfect on your first attempt.
Start small. Make just 5 packs this week and see how it feels. Once you experience the joy of grabbing a pre-made pack, blending for 60 seconds, and walking out the door with a healthy breakfast, you will be hooked.
Your future self, the one who sleeps in 10 minutes longer and still eats a nutritious breakfast, will thank you for starting today. Grab some freezer bags, hit the produce section, and prep your first batch of frozen smoothie packs this weekend.