
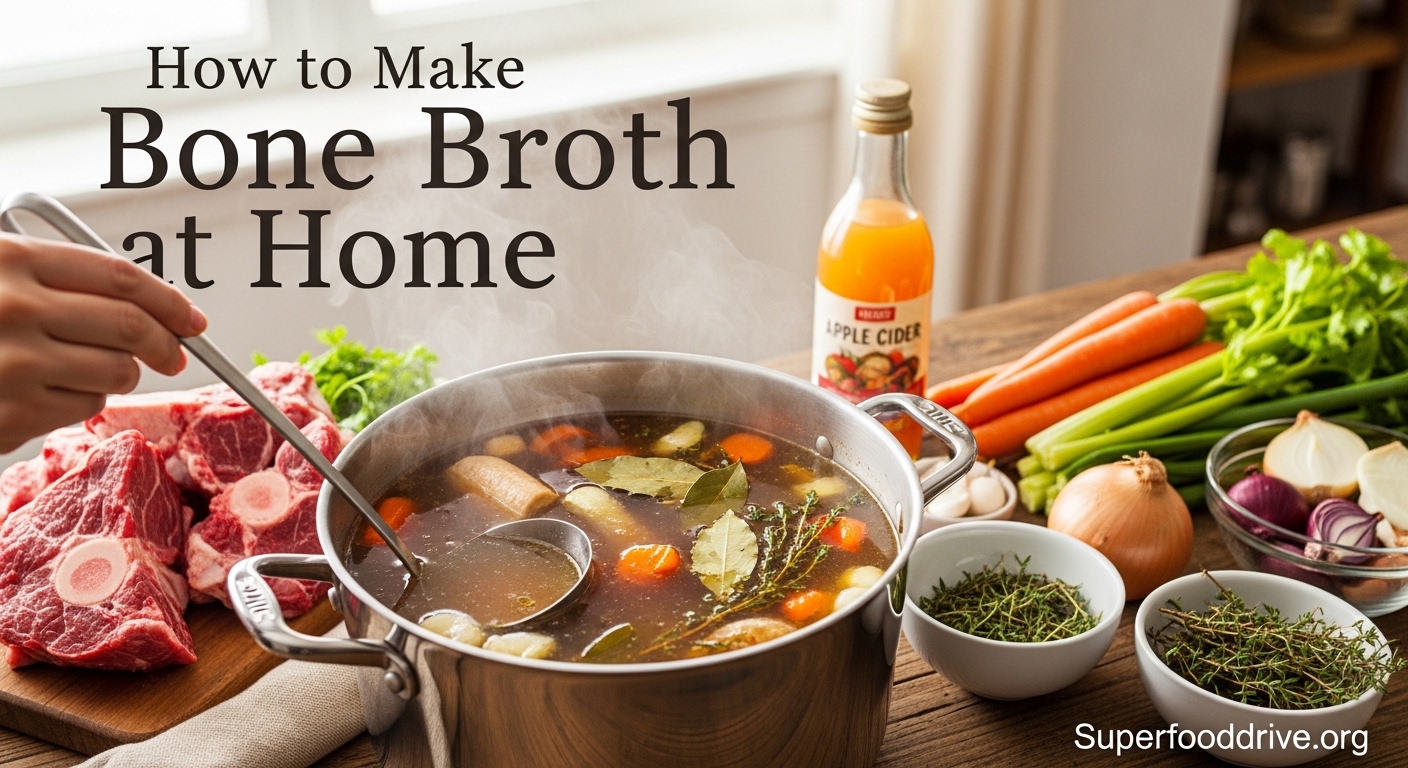
After years of making bone broth at home, I have learned that this simple, time-honored tradition delivers incredible nutrition and flavor that store-bought versions simply cannot match. Learning how to make bone broth at home is one of the most rewarding skills you can develop in your kitchen. The process fills your home with rich, savory aromas while creating a collagen-rich, nutrient-dense foundation for countless recipes.
In this complete guide, I will walk you through everything you need to know about making homemade bone broth. You will discover the best bones to use, step-by-step instructions for three different cooking methods, troubleshooting tips for common issues, and creative ways to incorporate this healing food into your daily routine.
Whether you are a complete beginner or looking to perfect your technique, this bone broth recipe will become a staple in your kitchen.
Table of Contents
What is Bone Broth?
Bone broth is a nutrient-dense liquid made by simmering animal bones and connective tissue in water for an extended period, typically 12 to 48 hours. This slow cooking process breaks down collagen and connective tissue, releasing gelatin, amino acids, and minerals into the water to create a protein-rich, flavorful broth.
Unlike regular broth or stock, bone broth is cooked long enough to extract the maximum amount of nutrients from the bones. The result is a deeply colored liquid that becomes gelatinous when cooled, indicating high collagen content.
Traditional cultures around the world have made bone broth for centuries, using every part of the animal to create nourishing, healing foods. Today, this ancient practice has experienced a revival as people rediscover its health benefits and incredible flavor.
Bone Broth vs Stock vs Regular Broth
Understanding the difference between these three staples helps you choose the right base for your recipes.
Regular broth is made primarily from meat and vegetables, simmered for 1-2 hours. It has a light flavor and thin consistency, perfect for sipping or as a soup base.
Stock includes bones along with meat and vegetables, simmered for 3-4 hours. It has more body than broth and works well for sauces, gravies, and cooking grains.
Bone broth focuses on bones and connective tissue, simmered for 12-48 hours to extract maximum collagen, gelatin, and minerals. It becomes thick and gelatinous when cooled and offers the most nutritional benefits.
Health Benefits of Bone Broth
Before diving into the bone broth recipe, let us explore why this traditional food has become so popular among health-conscious home cooks.
Joint and Bone Health
Bone broth is rich in collagen, gelatin, glucosamine, and chondroitin, all compounds that support joint health and may reduce inflammation. The long simmering process breaks down connective tissue into these bioavailable forms that your body can easily absorb.
I have noticed improved flexibility and less joint stiffness since making bone broth a regular part of my diet. Many people report similar benefits, particularly those with active lifestyles or age-related joint concerns.
Gut Health Support
The gelatin in bone broth helps seal and soothe the gut lining, potentially benefiting those with digestive issues. Glycine and proline, two abundant amino acids in bone broth, support digestive health and may help with conditions like leaky gut syndrome.
Forum discussions consistently mention bone broth as a soothing food for those with ulcerative colitis and other inflammatory bowel conditions. The easily digestible nutrients provide nourishment without irritating sensitive digestive systems.
Skin and Beauty Benefits
Collagen is essential for skin elasticity and hydration. Consuming collagen-rich bone broth may improve skin appearance from the inside out, reducing wrinkles and promoting a youthful glow.
Many regular bone broth drinkers report stronger nails and healthier hair, benefits attributed to the concentrated amino acids and minerals that support tissue growth and repair.
Sleep and Stress Relief
Glycine, an amino acid abundant in bone broth, has been shown to promote relaxation and improve sleep quality. It may help lower cortisol levels, the stress hormone that can interfere with restful sleep when elevated.
Drinking a warm cup of bone broth in the evening has become a calming ritual for many people, combining the soothing effects of glycine with the comfort of a warm beverage.
Additional benefits include immune system support from easily absorbed minerals like calcium, magnesium, and phosphorus, plus the anti-inflammatory effects of amino acids that support overall wellness.
Ingredients and Equipment
Gathering quality ingredients is the first step toward making exceptional bone broth. Here is everything you need.
Best Bones for Maximum Collagen
The type of bones you choose significantly impacts the final result. Here is a guide to the best options:
Knuckle bones and joints contain the highest concentration of collagen and connective tissue. These produce the most gelatinous bone broth.
Marrow bones add rich flavor and healthy fats. The marrow melts into the broth, creating a luxurious mouthfeel.
Neck bones and feet are gelatin powerhouses. Chicken feet, in particular, are prized for their ability to create an incredibly gelatinous broth.
Meaty bones like oxtail and short ribs contribute depth of flavor and additional nutrients from the meat.
For the best results, mix two to three different bone types. I typically use a combination of marrow bones, knuckle bones, and chicken feet for beef broth, or a whole chicken carcass plus extra feet for chicken broth.
Sourcing matters too. Grass-fed beef bones and pasture-raised chicken bones from local farmers or butchers provide superior flavor and nutrition. Many butchers sell soup bones affordably, and some give them away if you ask.
Vegetables and Aromatics
Classic aromatics enhance flavor without overpowering the broth:
- Onions (kept whole with skin for color)
- Carrots (adds subtle sweetness)
- Celery (provides depth)
- Garlic (optional, adds complexity)
- Bay leaves
- Whole peppercorns
- Fresh herbs like parsley or thyme
Apple cider vinegar is essential for helping extract minerals from the bones. The acid helps break down the bone matrix, releasing calcium, magnesium, and other minerals into the liquid. Use 1-2 tablespoons per quart of water.
Equipment You’ll Need
Basic equipment for making bone broth at home includes:
- Large stockpot (8-quart minimum for big batches) or Dutch oven
- Baking sheet for roasting bones
- Fine-mesh strainer or cheesecloth
- Spider skimmer or slotted spoon for skimming
- Ladle for transferring liquid
- Storage containers or jars
Optional but helpful tools include a slow cooker or Instant Pot for alternative cooking methods, and a fat separator for removing excess fat.
How to Make Bone Broth at Home
Now for the main event. This step-by-step bone broth tutorial covers the stovetop method, which gives you the most control over the process.
Step 1: Prepare Your Bones
Start with 4-5 pounds of mixed bones for a standard stockpot. If using raw beef or pork bones, you may want to blanch them first to remove impurities that can create off-flavors.
To blanch, cover bones with cold water in a large pot, bring to a boil for 10-15 minutes, then drain and rinse. This step is optional but recommended for the clearest broth. Many home cooks skip blanching for chicken bones but include it for beef.
Step 2: Roast for Deeper Flavor
Roasting bones is essential for developing rich, complex flavor. Preheat your oven to 400 degrees Fahrenheit.
Place bones in a single layer on a baking sheet. Roast for 30-45 minutes, turning once halfway through, until deeply browned. If using meaty bones like oxtail or short ribs, roast until the meat develops a caramelized crust.
Add onions, carrots, and garlic to the roasting pan during the last 15 minutes for extra flavor depth. The vegetables will caramelize and add sweetness to your finished broth.
Step 3: Transfer to Stockpot
Transfer roasted bones and vegetables to your stockpot. Scrape any browned bits from the roasting pan into the pot. These bits, called fond, contain concentrated flavor.
Add any additional aromatics: bay leaves, peppercorns, fresh herbs, and celery stalks.
Step 4: Add Water and Vinegar
Cover everything with cold, filtered water, leaving about 2 inches of space at the top of your pot. The water should cover bones by at least 1 inch.
Add 2 tablespoons of apple cider vinegar. This acid is crucial for extracting minerals from the bones during the long cooking process.
Let the mixture sit for 30 minutes before heating. This allows the vinegar to begin breaking down the bone matrix.
Step 5: Bring to a Boil and Skim
Bring the pot to a gentle boil over medium-high heat. As the temperature rises, foam and impurities will rise to the surface.
Skim this foam using a spider skimmer or slotted spoon. This step creates a clearer final broth. Continue skimming for the first 30 minutes of cooking.
Do not skip this step. The scum contains proteins and impurities that can make your broth cloudy and create off-flavors if left in.
Step 6: Simmer Low and Slow
Reduce heat to the lowest setting and maintain a gentle simmer. You should see occasional bubbles breaking the surface, not a rolling boil.
Cover partially with a lid, leaving a small gap for steam to escape. This prevents excess evaporation while allowing some concentration.
Simmer for 12-48 hours depending on the bones:
- Chicken bones: 12-24 hours
- Beef bones: 24-48 hours
- Mixed bones: 18-36 hours
The longer you simmer, the more nutrients you extract. Check occasionally and add hot water if the level drops below the bones.
Step 7: Strain and Cool
When cooking is complete, remove from heat and let cool slightly. Use tongs to remove large bones and vegetables, then strain the liquid through a fine-mesh strainer lined with cheesecloth into another pot or large bowl.
Discard the solids. The bones will be soft and crumbly, having given up their nutrients. Some people give cooled bones to pets, but avoid this if you added onions or garlic.
Let the strained broth cool to room temperature, then refrigerate.
Step 8: Store Properly
After refrigerating overnight, a layer of fat will solidify on top. This fat cap helps preserve the broth underneath. You can remove it for a leaner broth or save it for cooking.
The broth should be gelatinous and jiggle when cold. This indicates high collagen content. It will liquefy again when heated.
Alternative Cooking Methods
While the stovetop method produces excellent results, you can also make bone broth using a slow cooker or Instant Pot.
Slow Cooker Method
The slow cooker offers a hands-off approach with minimal risk of burning or boiling over.
Follow the same preparation steps: roast bones and vegetables, then transfer to your slow cooker. Add vinegar and water to cover.
Set to LOW and cook for 24-48 hours. Some slow cookers run hot, so check the temperature occasionally. You want a gentle simmer, not a rapid boil.
This method is ideal for overnight cooking or when you need to leave the house. The low, consistent heat extracts nutrients effectively while you attend to other tasks.
Instant Pot/Pressure Cooker Method
The Instant Pot dramatically reduces cooking time while still producing flavorful, nutrient-rich bone broth.
After roasting bones and vegetables, place them in the Instant Pot with vinegar and water. Do not fill above the maximum fill line.
Pressure cook on HIGH for 3-4 hours for chicken bones, or 4-5 hours for beef bones. Allow natural pressure release for best results.
While the Instant Pot method is faster, some enthusiasts believe the longer stovetop method produces superior flavor and possibly more nutrient extraction. I use both methods depending on my schedule.
Cooking Method Comparison
| Method | Time | Pros | Cons |
|---|---|---|---|
| Stovetop | 12-48 hours | Best flavor control, traditional method | Requires monitoring, uses stove space |
| Slow Cooker | 24-48 hours | Hands-off, safe overnight | May run too hot or cold |
| Instant Pot | 3-5 hours | Fastest method, consistent results | Less hands-on aroma enjoyment |
Storage and Usage
Proper storage ensures your homemade bone broth stays fresh and safe to consume.
How to Store Bone Broth
Refrigerate bone broth in airtight containers for up to 5 days. The fat layer on top acts as a natural seal, so leave it in place until ready to use.
For longer storage, freeze bone broth in portions that match your typical usage. I recommend freezing in:
- Ice cube trays for small amounts (perfect for sauces)
- Mason jars, leaving 2 inches headspace for expansion
- Freezer bags laid flat for efficient storage
- Silicone muffin tins for 1-cup portions
Frozen bone broth lasts 6-12 months. Thaw overnight in the refrigerator or use the defrost setting on your microwave.
How to Use Your Homemade Bone Broth
Bone broth is incredibly versatile. Here are my favorite ways to use it:
Sipping: Warm 1-2 cups and drink plain or with a pinch of sea salt and fresh herbs. This is how many people consume it for health benefits.
Soup base: Use as the foundation for soups and stews. It adds incredible depth of flavor to any recipe calling for broth or stock.
Cooking grains: Replace water with bone broth when cooking rice, quinoa, or couscous for extra nutrition and flavor.
Sauces and gravies: Reduce bone broth to create rich pan sauces and gravies that taste restaurant-quality.
Braising: Use as the liquid for braising meats and vegetables.
Smoothies: Add a splash to savory smoothies for protein and nutrients.
Tips and Troubleshooting
Even experienced cooks encounter challenges when making bone broth. Here is how to address common issues.
Why Didn’t My Bone Broth Gel?
This is the most common bone broth problem. If your broth stays liquid when cold, it lacks sufficient gelatin.
Causes and solutions:
Not enough collagen-rich bones. Next time, add more knuckle bones, joints, or chicken feet. These contain the connective tissue needed for gelatin formation.
Cooking time too short. Extend the simmering time to extract more collagen from the bones.
Too much water relative to bones. Use enough bones to fill your pot at least halfway before adding water.
Boiling instead of simmering. High heat breaks down gelatin. Keep the temperature low and gentle.
Remember, broth that does not gel is still nutritious and flavorful. It simply contains less concentrated collagen.
Other Common Issues
Cloudy broth: Usually caused by boiling too vigorously or not skimming adequately. Next time, maintain a gentle simmer and skim diligently during the first hour.
Weak flavor: Roast bones longer before simmering, or reduce the finished broth by simmering uncovered to concentrate flavors.
Too much fat: Chill the broth completely and remove the solidified fat layer. Save this tallow or schmaltz for cooking.
Off flavors: Blanch raw beef or pork bones before roasting to remove impurities. Ensure bones are fresh and from quality sources.
Safety Tips for Long Simmering
Safety is crucial when cooking for extended periods:
Never leave a gas stove unattended overnight. Use a slow cooker or Instant Pot instead for unattended cooking.
Keep the simmer gentle to prevent boiling dry. Check water levels every few hours for stovetop cooking.
Ensure adequate ventilation in your kitchen.
If using an electric stove, verify it can maintain a low simmer without cycling on and off excessively.
Some cooks refrigerate the pot overnight and resume cooking the next day for safety and convenience.
Frequently Asked Questions
What are the best bones to make bone broth?
The best bones are those rich in connective tissue. Knuckle bones, joints, and chicken feet contain the most collagen and produce the most gelatinous broth. Marrow bones add rich flavor, while neck bones and oxtail provide depth. Mix 2-3 different bone types for optimal results. Grass-fed beef and pasture-raised chicken bones offer superior nutrition.
Does bone broth lower cortisol?
Bone broth contains glycine, an amino acid that may help reduce cortisol levels and promote relaxation. Glycine supports the nervous system and can improve sleep quality. While research is ongoing, many people report feeling calmer after drinking bone broth regularly. It should be part of an overall stress management approach including proper sleep, exercise, and diet.
How to make bone broth at home?
To make bone broth at home, roast 4-5 pounds of mixed bones at 400F for 30-45 minutes. Transfer to a stockpot with vegetables, cover with water, and add 2 tablespoons apple cider vinegar. Bring to a boil, skim the foam, then simmer on low for 12-48 hours. Strain, cool, and refrigerate. The broth should gel when cold.
Is bone broth good for UC patients?
Bone broth may be soothing for those with ulcerative colitis and other digestive issues. It is easy to digest, nutrient-rich, and contains amino acids that support gut health. The gelatin can help soothe the digestive tract. However, individual responses vary. Consult your healthcare provider before adding bone broth to your specific treatment plan.
How long does homemade bone broth last?
Homemade bone broth lasts up to 5 days in the refrigerator when stored in airtight containers. The fat layer that forms on top helps preserve the broth underneath. For longer storage, freeze bone broth for 6-12 months. Freeze in portions using ice cube trays, mason jars with headspace, or freezer bags for convenience.
Can I freeze bone broth?
Yes, bone broth freezes exceptionally well. Freeze in ice cube trays for small portions, silicone muffin tins for 1-cup servings, or mason jars with 2 inches of headspace for larger amounts. Frozen bone broth maintains quality for 6-12 months. Thaw overnight in the refrigerator or using your microwave’s defrost setting.
Do I need to roast bones for bone broth?
Roasting bones is highly recommended but not strictly required. Roasting at 400F for 30-45 minutes before simmering creates deeper, richer flavor through the Maillard reaction. It adds color and complexity that raw bones cannot achieve. Skip roasting only if you prefer a very light-colored, neutral-tasting broth.
How much bone broth should I drink daily?
Most practitioners recommend 1-2 cups of bone broth daily for general wellness. Some protocols suggest up to 4 cups for specific therapeutic purposes. Start with 1 cup and adjust based on your response. Listen to your body and consult a healthcare provider if using bone broth as part of a treatment plan for specific health conditions.
Conclusion
Learning how to make bone broth at home is a valuable skill that rewards you with nutrient-dense, flavorful broth for a fraction of the cost of store-bought versions. By following this bone broth recipe, you will create a collagen-rich foundation for soups, sauces, and healthy sipping that supports your joints, gut, and overall wellness.
Start with quality bones from grass-fed or pasture-raised animals, take time to roast them for depth of flavor, and simmer low and slow to extract maximum nutrition. Whether you choose the stovetop, slow cooker, or Instant Pot method, the result will be a healing, traditional food your body will thank you for.
Make your first batch this week and experience the difference homemade bone broth makes in your kitchen and your health.