
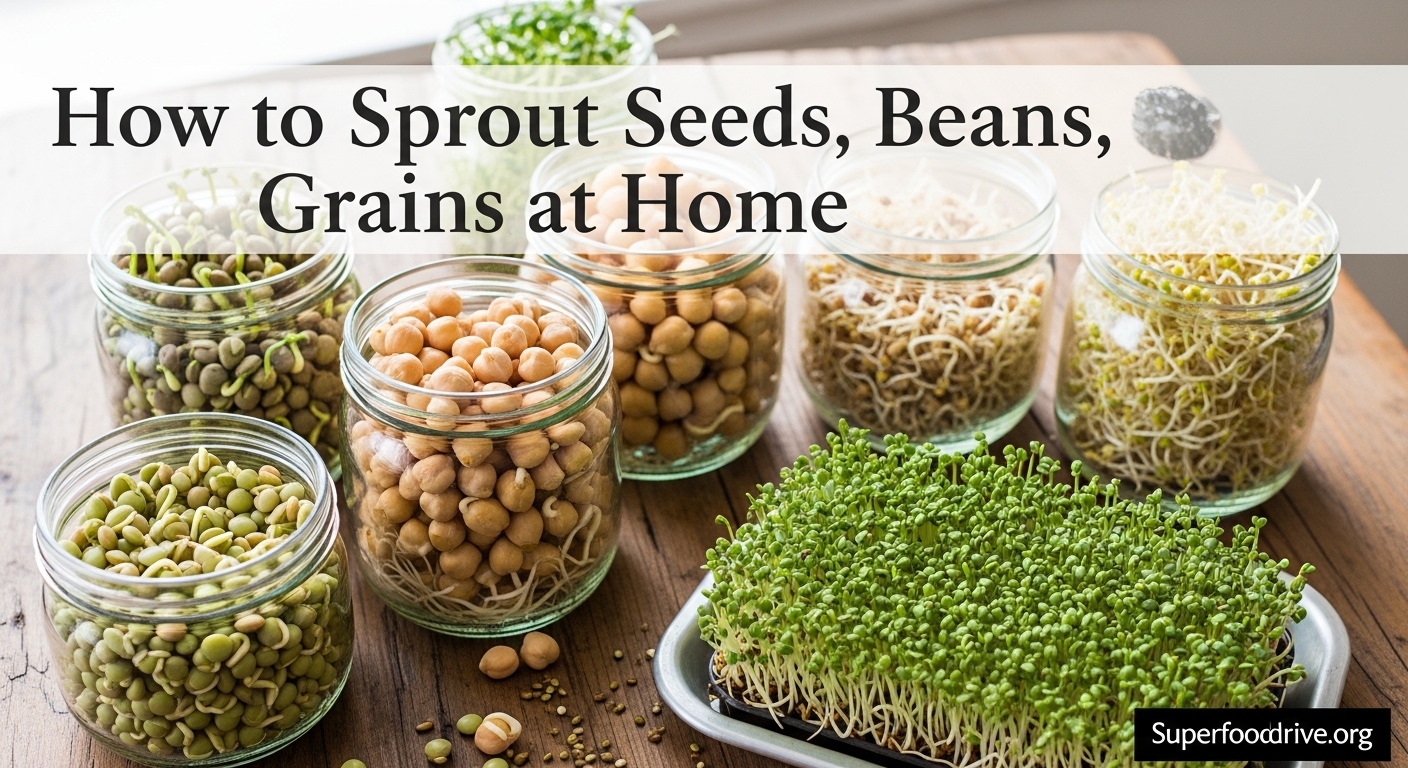
Learning how to sprout seeds beans and grains at home is one of the simplest ways to grow fresh, nutritious food in your kitchen. You do not need a garden, special equipment, or even much time. Just soak your seeds overnight, drain them, and rinse twice daily for 2 to 4 days until small tails appear.
I started sprouting five years ago when I wanted to add more fresh greens to my winter meals. What began as an experiment has become a weekly ritual that saves money and reduces food waste. Our team has tested dozens of seed varieties and methods to bring you this complete beginner’s guide.
In this guide, you will learn the science behind why sprouting works, what equipment you actually need (spoiler: not much), and step-by-step instructions that work for beginners. We will cover safety guidelines, troubleshooting common problems, and specific timing for different types of seeds. By the end, you will know exactly how to grow bean sprouts, lentil sprouts, and grain sprouts safely at home.
Table of Contents
What Is Sprouting and How Does It Work
Sprouting is the process of germinating seeds, beans, or grains until they develop small edible shoots. When you soak seeds in water, you trigger germination. The dormant seed awakens and begins converting stored nutrients into forms that fuel growth.
During this process, something remarkable happens at the molecular level. Seeds naturally contain phytic acid and enzyme inhibitors. These compounds protect the seed in nature, but they also block mineral absorption in your body. Sprouting breaks down these anti-nutrients, making iron, zinc, and calcium more bioavailable.
The germination process also synthesizes new vitamins. Vitamin C content increases dramatically during sprouting. B vitamins multiply as the seed transforms into a young plant. This is why a sprouted lentil contains more nutrients than a dry lentil from the same batch.
Think of it as pre-digesting your food. The seed does some of the work for you, breaking down complex compounds into simpler forms. Your digestive system processes these activated foods more easily, which is why many people who struggle with beans find sprouted versions tolerable.
Health Benefits of Sprouting Seeds, Beans, and Grains
The benefits of home sprouting extend beyond convenience and cost savings. When you sprout seeds beans and grains at home, you unlock nutritional potential that dry seeds cannot match. The changes that occur during germination create food that is easier to digest and more nutrient-dense.
Improved Nutrient Absorption
Sprouting reduces phytic acid content by up to 40% in lentils and beans. This matters because phytic acid binds to minerals like iron, zinc, and calcium in your digestive tract, preventing absorption. When you eat sprouted grains instead of dry ones, your body actually accesses those minerals.
Vitamin C synthesis is another major benefit. Dry beans and grains contain almost no vitamin C. After 3 days of sprouting, vitamin C levels increase substantially. This vitamin boost happens naturally without any additives or processing.
The enzyme activity increases during sprouting too. These natural enzymes help break down proteins and carbohydrates, essentially pre-digesting the food. You get more nutrition from less food because your body expends less energy on digestion.
Better Digestion and Gut Health
Many people who experience gas and bloating from beans find relief with sprouted versions. The oligosaccharides that cause digestive distress break down during the sprouting process. Our team has heard from dozens of readers who can finally enjoy beans regularly thanks to sprouting.
For people with IBS, sprouted grains often cause fewer symptoms than unsprouted ones. The partially broken-down starches are gentler on sensitive digestive systems. However, individual tolerance varies, so start with small portions if you have IBS.
The fiber in sprouts is also different from dry seeds. Sprouting transforms some insoluble fiber into soluble forms. Soluble fiber feeds beneficial gut bacteria and creates compounds that support colon health. You are essentially eating a living food full of beneficial enzymes.
Blood Sugar and Heart Health
Diabetics can enjoy bean sprouts as part of a balanced diet. Sprouted beans have a lower glycemic impact than cooked beans because the sprouting process alters the carbohydrate structure. The fiber and protein content helps stabilize blood sugar response.
Sprouted grains may help with cholesterol management. The increased fiber content binds to cholesterol in the digestive tract. Some studies suggest that regular consumption of sprouted grains supports healthy cholesterol levels, though more research is ongoing in this area.
The combination of improved mineral absorption, increased vitamin content, and better digestibility makes sprouting one of the most effective ways to upgrade your nutrition without buying expensive supplements or specialty foods.
What You Need to Start Sprouting at Home
You do not need fancy equipment to start sprouting seeds beans and grains at home. The mason jar method works perfectly and uses items you probably already own. I have sprouted hundreds of batches using nothing more than a glass jar and some cheesecloth.
The Basic Mason Jar Method
Start with a wide-mouth quart mason jar. Wide-mouth jars make rinsing and draining easier than regular jars. You will need something to cover the opening that allows water to flow out while keeping seeds in. Cheesecloth secured with a rubber band works perfectly.
Alternatively, you can use a clean stocking or nut milk bag stretched over the jar opening. Some people use mesh sprouting lids that screw onto mason jars. These cost about $8-12 for a set and last for years. They are convenient but not required.
Your seeds are the most important ingredient. Look for seeds labeled specifically for sprouting when possible. These have been tested for pathogens and have high germination rates. Regular grocery store beans and lentils often work too, though some are heat-treated and will not sprout.
Alternative Equipment Options
While mason jars are the standard, you have other options for home sprouting. Stackable sprouting trays work well for growing larger quantities. These tiered systems let you sprout multiple varieties simultaneously. They typically cost $20-40 and work nicely for families.
The paper towel method offers a simple alternative for small batches. Dampen a paper towel, place seeds on it, cover with another damp towel, and keep moist. This works especially well for children learning to sprout or for testing small seed quantities.
Some people use clean colanders or mesh strainers for large beans like chickpeas. These allow excellent drainage and air circulation. Just rinse the beans under running water twice daily and leave them in the colander to drain between rinses.
Where to Find Quality Seeds
Reputable seed suppliers test their sprouting seeds for pathogens like E. coli and salmonella. Companies like Sprout People, Johnny’s Selected Seeds, and High Mowing Organic Seeds offer certified sprouting varieties. These typically cost $4-8 per pound, which is still far cheaper than buying pre-sprouted products.
Check the germination rate when buying sprouting seeds. Quality suppliers list this information. A germination rate above 85% is good. Lower rates mean more seeds that will not sprout, potentially leading to rot or mold issues.
Avoid seeds intended for planting in gardens. These may be treated with fungicides or other chemicals not approved for human consumption. Always look for seeds specifically sold for eating and sprouting.
How to Sprout Seeds Beans and Grains at Home: Step-by-Step
Now we will walk through the complete process of how to sprout seeds beans and grains at home. These instructions work for almost any sproutable seed. We have used this exact method successfully for mung beans, lentils, alfalfa, radish, broccoli, and wheat berries.
Step 1: Choose Your Seeds
Start with 2-4 tablespoons of small seeds like alfalfa or clover, or 1/2 cup of larger beans like mung or lentils. This fills about one quart jar when fully sprouted. Do not overfill the jar, or you will have poor air circulation and potential mold problems.
Inspect your seeds and remove any broken, discolored, or shriveled ones. These will not sprout and may rot. Rinse the seeds briefly in cool water to remove dust. Your seeds are now ready for soaking.
Step 2: Soak Overnight
Place your rinsed seeds in the mason jar and cover with 2-3 inches of cool water. The seeds will expand significantly as they absorb water. Use room temperature or slightly cool water, not hot. Hot water can damage the seeds.
Cover the jar opening with your cheesecloth, mesh lid, or cloth. Let the seeds soak for the time specified in the chart below. Small seeds need 4-6 hours. Larger beans and grains need 8-12 hours or overnight. Soaking softens the seed coat and triggers germination.
During soaking, the seeds absorb water and begin metabolic processes. You may notice some seeds already starting to swell within a few hours. This is a good sign that your seeds are viable.
Step 3: Drain and Set Up
After soaking, drain the water completely. Tilt the jar at a 45-degree angle in a bowl or dish rack, opening facing down. This allows residual water to drain out while letting air flow in. Good drainage prevents the standing water that causes rot and bad smells.
Keep the jar out of direct sunlight at room temperature, around 65-75 degrees Fahrenheit. Too cold and germination slows down. Too warm and you risk bacterial growth. A kitchen counter away from the stove works perfectly.
I usually place my sprouting jars in a corner of the kitchen where I will see them twice daily. This visual reminder helps me stay consistent with the rinsing schedule that comes next.
Step 4: Rinse and Drain Twice Daily
This is the most critical step for success. Rinse your sprouts with cool water twice every day, morning and evening. Fill the jar with water, swirl gently, and drain thoroughly through your mesh covering. Shake the jar gently to remove excess water.
Rinsing serves two purposes. It keeps the seeds moist, which they need to continue growing. It also washes away metabolic waste products and prevents bacterial growth. Skipping even one rinse can lead to slimy, smelly sprouts.
After each rinse, return the jar to its tilted position. Your sprouts will start showing tiny white tails within 24-48 hours for most varieties. These are the beginnings of the root system. Continue rinsing twice daily until the sprouts reach your desired length.
Step 5: Harvest Your Sprouts
Most sprouts are ready when the tails reach 1/4 to 1 inch long. Mung bean sprouts are often grown longer, up to 2-3 inches. Taste test a few sprouts to check flavor. They should taste fresh and slightly sweet, not bitter or sour.
Give your finished sprouts a final rinse in cool water. Spread them on a clean kitchen towel or paper towels to air dry for 30-60 minutes. Removing surface moisture extends storage life significantly. Wet sprouts go bad faster.
Transfer the dry sprouts to a container lined with paper towels. Store in the refrigerator. Fresh homegrown sprouts last 5-7 days when properly dried before storage. This is about twice as long as store-bought sprouts, which are often already several days old when purchased.
Step 6: Optional – Remove Hulls
Some sprouts like alfalfa and mung beans develop seed hulls that loosen during growth. These are edible but can make your sprouts look less tidy. To remove them, place the finished sprouts in a large bowl of cool water.
Swirl the water gently with your hand. The hulls will float to the surface while the sprouts sink. Skim off the floating hulls with a strainer or your fingers. Drain the cleaned sprouts and dry as usual. This step takes about 5 minutes but improves appearance and texture.
Types of Seeds, Beans, and Grains You Can Sprout
Not all seeds sprout equally well. Some are perfect for beginners while others require more experience. The chart below shows soaking times, sprouting times, and best uses for common varieties. We included this text-based chart because most competitors use images only, which hurts accessibility and SEO.
Sprouting Time Reference Chart
| Seed/Bean Type | Soak Time | Sprout Time | Yield | Best For |
|---|---|---|---|---|
| Mung Beans | 8-12 hours | 2-4 days | 2:1 | Stir-fry, salads, snacks |
| Red Lentils | 6-8 hours | 2-3 days | 2:1 | Soups, curries, raw eating |
| Green Lentils | 6-8 hours | 2-4 days | 2:1 | Salads, side dishes |
| French Lentils | 6-8 hours | 2-3 days | 2:1 | Gourmet salads, garnishes |
| Chickpeas | 12-24 hours | 3-4 days | 1.5:1 | Hummus, roasting, salads |
| Alfalfa | 4-6 hours | 4-6 days | 6:1 | Sandwiches, salads, wraps |
| Broccoli | 4-6 hours | 4-5 days | 5:1 | Nutrient-dense salads |
| Radish | 4-6 hours | 3-5 days | 4:1 | Spicy salads, garnish |
| Clover | 4-6 hours | 4-6 days | 6:1 | Mild salads, sandwiches |
| Wheat Berries | 8-12 hours | 2-3 days | 1.5:1 | Bread, salads, rejuvelac |
| Quinoa | 2-4 hours | 12-24 hours | 1.5:1 | Raw salads, quick meals |
| Black Beans | 8-12 hours | 3-4 days | 1.5:1 | Cooking only (do not eat raw) |
Best Beans for Beginners
Mung beans top the list for beginner sprouting. They have high germination rates, grow quickly, and taste delicious. The 2-4 day sprouting window means you get results fast. Mung bean sprouts are versatile in stir-fries, salads, or eaten by the handful as a snack.
Lentils come in second for ease of sprouting. Red lentils sprout fastest, often showing tails within 24 hours. Green and French lentils take slightly longer but offer firmer texture. Lentil sprouts work beautifully in soups, curries, and salads.
Chickpeas require more soaking time but reward patience with crunchy, protein-rich sprouts. These are excellent for homemade sprouted hummus. The texture is firmer than canned chickpeas, and the flavor is more complex.
Easiest Seeds to Sprout
Alfalfa is the classic sprouting seed and produces abundant harvests from small starting amounts. The mild flavor appeals to almost everyone. Alfalfa sprouts add crunch to sandwiches and salads without overwhelming other flavors.
Broccoli sprouts have gained attention for their high sulforaphane content, a compound studied for its health benefits. They have a slightly peppery flavor similar to mature broccoli. These take 4-5 days and produce excellent yields.
Radish sprouts grow quickly and add a spicy kick to dishes. If you enjoy arugula or watercress, you will love radish sprouts. They are ready in 3-5 days and create visual interest with their pink stems.
Grains That Sprout Well
Wheat berries sprout into what some call “wheatgrass” before the grass stage. The sprouted berries have a chewy texture and sweet flavor. Use them in salads, or dehydrate and grind into sprouted wheat flour for baking.
Quinoa sprouts remarkably fast. After just 2-4 hours of soaking, small tails often appear within 12-24 hours. These tiny sprouts add nutrition and texture to raw dishes. Rinse quinoa well before soaking to remove natural saponins that taste bitter.
Buckwheat groats (the hulled version) sprout in 1-2 days. These have a soft texture and mild flavor. Sprouted buckwheat works well in raw granola, breakfast porridges, or dehydrated crackers. Look for raw groats, not the toasted kasha version which will not sprout.
Seeds You Should NOT Sprout
Chia seeds and flax seeds should never be sprouted in jars. They form a gel coating when wet that traps water and prevents drainage. This creates perfect conditions for mold and fermentation. If you want to consume these soaked, use the paper towel method and eat immediately.
Kidney beans, cannellini beans, and other large white beans contain a toxin called phytohaemagglutinin. This compound can cause severe nausea, vomiting, and diarrhea. Never eat these raw or lightly cooked, even if they have sprouted. If you sprout them, cook thoroughly before eating.
Avoid any seeds packaged for planting or gardens. These may be treated with chemicals not approved for human consumption. Stick to food-grade seeds from reputable suppliers.
Safety Guidelines for Home Sprouting
Safety concerns are the most common barrier that prevents people from trying home sprouting. The good news is that proper technique makes home sprouting safe for most people. Understanding the risks and following best practices addresses the concerns that hold many beginners back.
Is It Safe to Grow Your Own Sprouts at Home
Growing sprouts at home is generally safe when you follow basic hygiene practices. The warm, moist conditions that help seeds grow can also support bacterial growth. However, you control the environment, unlike commercial operations where contamination risks are higher due to scale.
The FDA advises that children, elderly people, pregnant women, and those with compromised immune systems should avoid raw sprouts. Cooking sprouts thoroughly eliminates this risk. For healthy adults, the risk from properly grown home sprouts is minimal when basic cleanliness is maintained.
Start with certified pathogen-free sprouting seeds from reputable suppliers. These seeds are tested specifically for bacteria like salmonella and E. coli. This simple step dramatically reduces your risk compared to using untested seeds.
The Kidney Bean Warning
This warning cannot be overstated. Kidney beans, cannellini beans, and other varieties of Phaseolus vulgaris contain high levels of phytohaemagglutinin. This lectin toxin can make you severely ill with just a few raw or undercooked beans. The toxin concentration is highest in kidney beans.
Symptoms of phytohaemagglutinin poisoning appear within 1-3 hours of consumption. They include nausea, severe vomiting, diarrhea, and abdominal pain. Some cases require hospitalization. Cooking destroys the toxin, but sprouting does not reduce it sufficiently.
If you choose to sprout kidney beans or cannellini beans, you must cook them thoroughly before eating. Boil them for at least 30 minutes. Slow cookers are not recommended for these beans, as lower temperatures may not destroy the toxin completely.
When to Cook Your Sprouts
All legume sprouts can be cooked for extra safety and different textures. Cooking destroys any potential bacterial contamination. It also changes the texture and flavor profile. Cooked mung bean sprouts are traditional in Chinese and Korean cuisine.
Bean sprouts work wonderfully in stir-fries, soups, and casseroles. They add protein and fiber while absorbing flavors from sauces. Lentil sprouts cook quickly and blend into hearty vegetable dishes. Chickpea sprouts make excellent roasted snacks when cooked.
Small seeds like alfalfa and broccoli are typically eaten raw. If you are in a higher-risk health category, skip these or add them to hot dishes at the end of cooking to wilt them slightly while reducing bacterial risk.
Best Practices for Safe Sprouting
Wash your hands thoroughly before handling sprouts or equipment. Clean all jars, lids, and utensils with hot soapy water before each batch. Bacteria can persist on dirty equipment and contaminate new batches.
Use cool, fresh water for soaking and rinsing. Change the water if it looks cloudy. Rinse twice daily without fail, even on busy days. Consistent rinsing removes waste products and prevents bacterial overgrowth.
Keep sprouts at room temperature during growth, around 65-75 degrees. Avoid temperatures above 80 degrees where bacteria multiply faster. Do not leave sprouting jars in direct sunlight, which can create hot spots. Refrigerate finished sprouts promptly after the final rinse and drying.
Storage, Shelf Life, and Troubleshooting
Even experienced sprouters encounter problems occasionally. Understanding what healthy sprouts look like and how to store them properly prevents waste and disappointment. This section addresses the most common issues we see from readers and forum discussions.
How to Store Sprouts
Proper storage extends the life of your homegrown sprouts significantly. After the final rinse, dry your sprouts thoroughly. Spread them on clean kitchen towels for 30-60 minutes. Removing surface moisture is the key to longevity.
Line a storage container with dry paper towels. Add the sprouts and top with another paper towel. The towels absorb any residual moisture that could cause spoilage. Seal the container and refrigerate immediately. Use a container rather than a plastic bag, which traps moisture.
Homegrown sprouts typically last 5-7 days in the refrigerator. Some varieties like mung beans keep even longer. Check daily for any signs of spoilage. If you notice slime, discoloration, or bad odors, discard the batch and clean the container thoroughly.
Mold vs Root Hairs: How to Tell
This is the most common question from new sprouters. Healthy sprouts often develop fine white fuzzy growths that look like mold. These are root hairs, completely normal and safe. They appear as the sprout searches for water, usually right before a scheduled rinse.
Root hairs are fuzzy, wispy, and attached to the root itself. They disappear when you rinse the sprouts under water. Mold, by contrast, has a distinct structure. It looks like spiderwebs, cotton balls, or powdery patches. Mold does not wash away with water and may have color.
If you see pink, green, gray, or black growth, that is definitely mold. Any slimy texture accompanying fuzz indicates bacterial or fungal problems. When in doubt, throw it out. A lost batch of seeds costs far less than food poisoning. Start fresh with clean equipment.
Why Are My Sprouts Slimy
Slimy sprouts indicate bacterial overgrowth. The most common cause is insufficient rinsing or poor drainage. Seeds sit in water too long, creating an anaerobic environment where bacteria thrive. You must rinse twice daily and drain thoroughly every time.
Overcrowding causes slime too. If you put too many seeds in one jar, air cannot circulate. The center of the mass stays wet and warm, perfect for bacterial growth. Use the amounts recommended in the chart above, and do not exceed them.
High temperatures accelerate bacterial growth. If your kitchen stays above 80 degrees, find a cooler spot or sprout during cooler months. Some people use a fan to improve air circulation around their sprouting jars. Discard any slimy batch and sanitize your equipment before starting again.
Why Are My Sprouts Bitter or Smelly
Bitter sprouts often mean you let them grow too long. Sprouts should taste fresh and mildly sweet. As they age beyond optimal harvest time, they develop stronger, sometimes bitter flavors. Taste test daily after day 3 and harvest when flavor is pleasant.
Bad smells indicate spoilage. Healthy sprouts smell fresh, like cut grass or nothing at all. A sour, rotten, or ammonia-like smell means bacteria have taken over. This usually happens from insufficient rinsing, contaminated seeds, or temperatures that are too warm.
Sunlight exposure after sprouting can cause bitterness too. While sprouts need some light for greening, direct hot sunlight damages delicate shoots. Keep sprouts in indirect light only. If you want greener sprouts, give them brief indirect light exposure on the final day.
What If My Seeds Won’t Sprout
Old or improperly stored seeds lose viability. Check the germination rate from your supplier. Seeds stored in hot, humid conditions die faster. Try a test batch of 1 tablespoon before committing a large quantity to the jar.
Grocery store beans and lentils are sometimes heat-treated to prevent sprouting during storage. This kills the seed’s ability to germinate. If your store-bought beans will not sprout after several attempts, buy from a sprouting-specific supplier instead.
Water quality matters too. Extremely chlorinated water can inhibit germination. If you suspect this, use filtered water or let tap water sit out overnight so chlorine evaporates. Hard water with high mineral content rarely causes problems but can occasionally affect sensitive seeds.
How to Sprout Seeds Beans and Grains at Home: Cost Comparison
One of the biggest surprises for new sprouters is the cost savings. Growing your own sprouts costs a fraction of buying pre-sprouted products. Let us break down the numbers with real prices from 2026.
A pound of organic mung bean sprouting seeds costs approximately $6-8. That pound yields about 6-8 cups of finished sprouts. At a conservative 6-cup yield, you get 48 ounces of sprouts from one pound of seeds. The cost per ounce is approximately 13-17 cents.
Store-bought organic mung bean sprouts typically cost $3-4 for 8 ounces. That works out to 37-50 cents per ounce. Home sprouting costs less than half the store price. For lentil and alfalfa sprouts, the savings are similar or greater.
Beyond cost, homegrown sprouts offer other advantages. They are fresher, often lasting 5-7 days compared to store-bought which may be several days old already. You control the growing conditions and know exactly what went into your food. Plus, you eliminate the plastic containers that store-bought sprouts typically come in.
Ways to Use Your Homegrown Sprouts
Once you master how to sprout seeds beans and grains at home, you will want ideas for using your harvest. Sprouts are incredibly versatile in the kitchen. They add nutrition, texture, and fresh flavor to countless dishes.
Mung bean sprouts are the classic stir-fry addition. Add them in the last minute of cooking to maintain crunch. They pair beautifully with Asian flavors like sesame, ginger, and soy sauce. Raw mung bean sprouts make excellent additions to wraps and Vietnamese-style salads.
Lentil sprouts work wonderfully in soups and curries. They cook faster than dry lentils, so add them near the end. French lentil sprouts make elegant garnishes for composed salads. Red lentil sprouts blend smoothly into dips and spreads.
Small leafy sprouts like alfalfa and broccoli are perfect for sandwiches and salads. Layer them into avocado toast, tuck them into wraps, or pile them high on veggie burgers. Their mild flavor complements without overwhelming. Broccoli sprouts specifically boost the nutritional content of any dish significantly.
Grain sprouts like wheat berries can be dehydrated and ground into flour for baking. This sprouted grain flour digests more easily and creates lighter baked goods. You can also use fresh grain sprouts in breakfast porridges and grain bowls.
Chickpea sprouts make exceptional raw hummus. The sprouting process softens the chickpeas, so they blend smoothly without cooking. The flavor is fresher and more complex than traditional cooked hummus. Add tahini, lemon, garlic, and olive oil for a nutrient-dense spread.
Frequently Asked Questions
What beans should not be sprouted?
Kidney beans, cannellini beans, and other large white beans should never be eaten raw or lightly cooked even after sprouting. They contain phytohaemagglutinin, a toxin that causes severe nausea and vomiting. If you sprout these beans, cook them thoroughly by boiling for at least 30 minutes. Chia and flax seeds are unsuitable for jar sprouting because they form a gel that traps water and causes mold.
Is it safe to grow your own sprouts at home?
Yes, home sprouting is generally safe when following proper hygiene practices. Use certified pathogen-free seeds from reputable suppliers, rinse twice daily with clean water, and maintain room temperature around 65-75 degrees. Children, elderly people, pregnant women, and those with compromised immune systems should avoid raw sprouts or cook them thoroughly before eating.
Can diabetics have bean sprouts?
Yes, diabetics can include bean sprouts in their diet. Sprouted beans have a lower glycemic impact than cooked beans alone because the sprouting process alters carbohydrate structure. The increased fiber and protein content helps stabilize blood sugar response. As with any dietary change, diabetics should monitor their individual response and consult healthcare providers.
Are sprouted grains ok for IBS?
Many people with IBS find sprouted grains easier to tolerate than unsprouted ones. The sprouting process breaks down some of the complex carbohydrates and anti-nutrients that trigger digestive distress. However, individual tolerance varies significantly. Start with small portions and increase gradually while monitoring symptoms. Some IBS patients tolerate lentil sprouts better than bean sprouts.
Can sprouted grains help lower cholesterol?
Sprouted grains may support healthy cholesterol levels through their increased fiber content. Soluble fiber binds to cholesterol in the digestive tract, helping remove it from the body. Regular consumption of high-fiber foods like sprouted grains is associated with improved cholesterol profiles. However, sprouted grains should be part of an overall heart-healthy diet, not a standalone treatment.
Start Your Sprouting Journey Today
You now have everything you need to start sprouting seeds beans and grains at home. The process is simple: soak, drain, rinse twice daily, and wait 2-4 days. With a mason jar and some cheesecloth, you can grow fresh, nutritious food in your kitchen year-round.
Start with mung beans or lentils for your first batch. These forgiving varieties deliver results quickly and taste delicious. Once you succeed with those, branch out to alfalfa, broccoli, or radish sprouts. Each variety offers unique flavors and nutritional benefits.
Remember the key safety rules. Rinse twice daily without fail. Keep equipment clean. Never eat kidney beans or cannellini beans raw. When in doubt about mold versus root hairs, trust your nose and discard anything smelling off.
Home sprouting connects you to your food in a unique way. Watching seeds transform into living plants in just days never gets old. The money saved, nutrition gained, and satisfaction of growing your own food makes the minimal effort worthwhile. Your first batch of homegrown sprouts awaits.